Saturday 27 December 2014

Editing Process


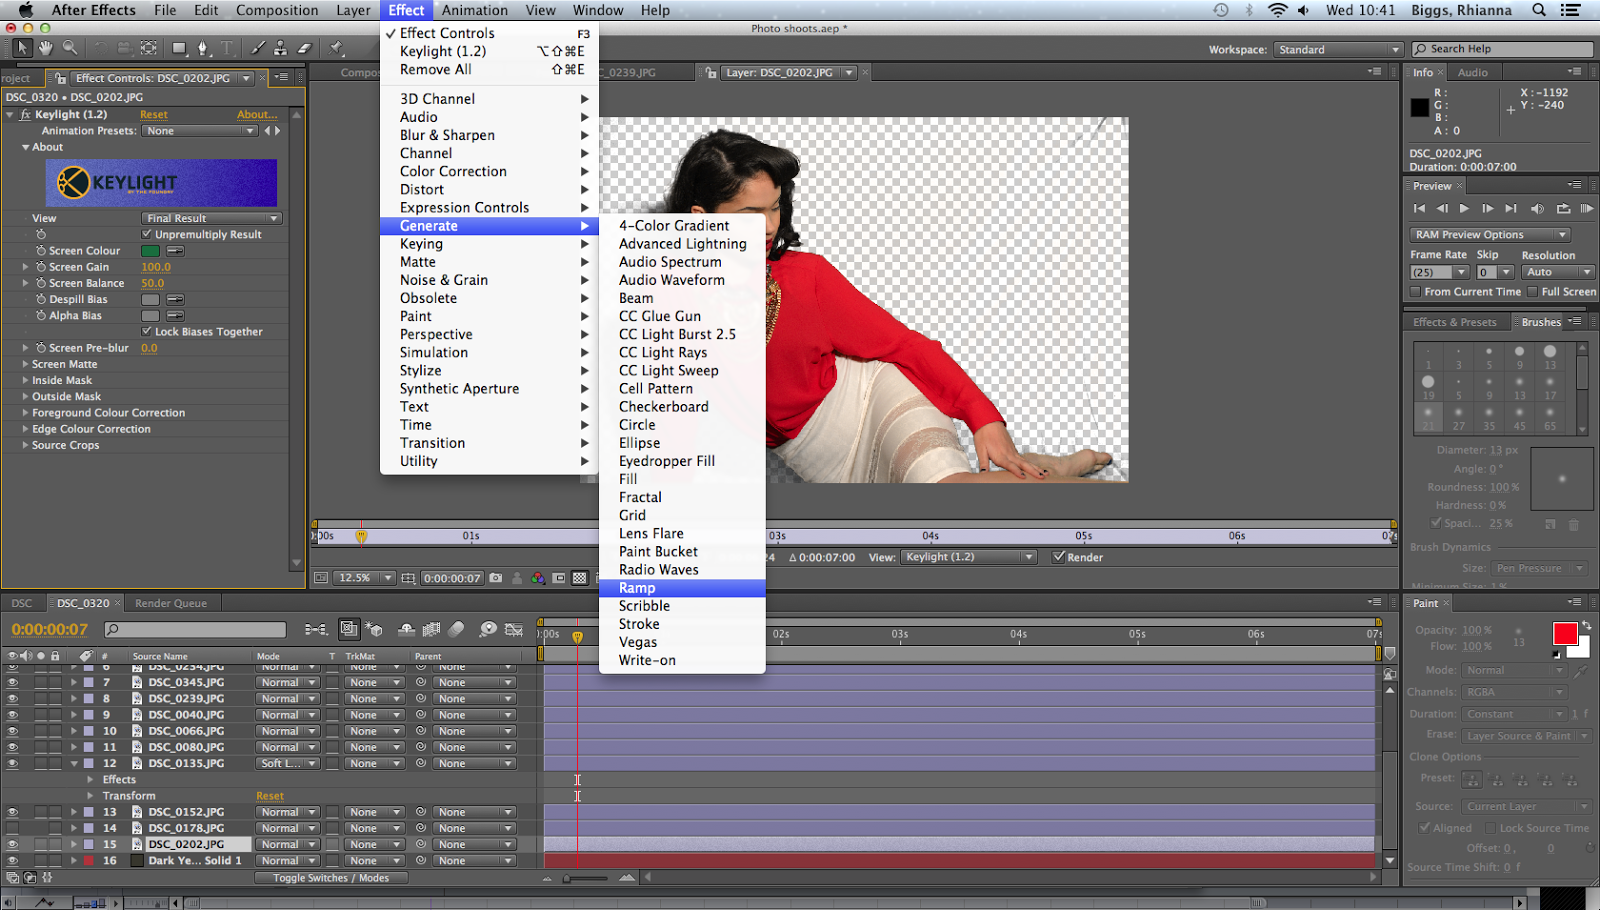
I used after effects to block out the green screen. I clicked on effects on the top bar, keying, followed by the keylight option. After removing the green screen I was able to change the image to screen matte and change the lighting using black and white which made the background fully transparent and the image bolder. I then softened the edges to make them cleaner. I repeated this process with all my other images.


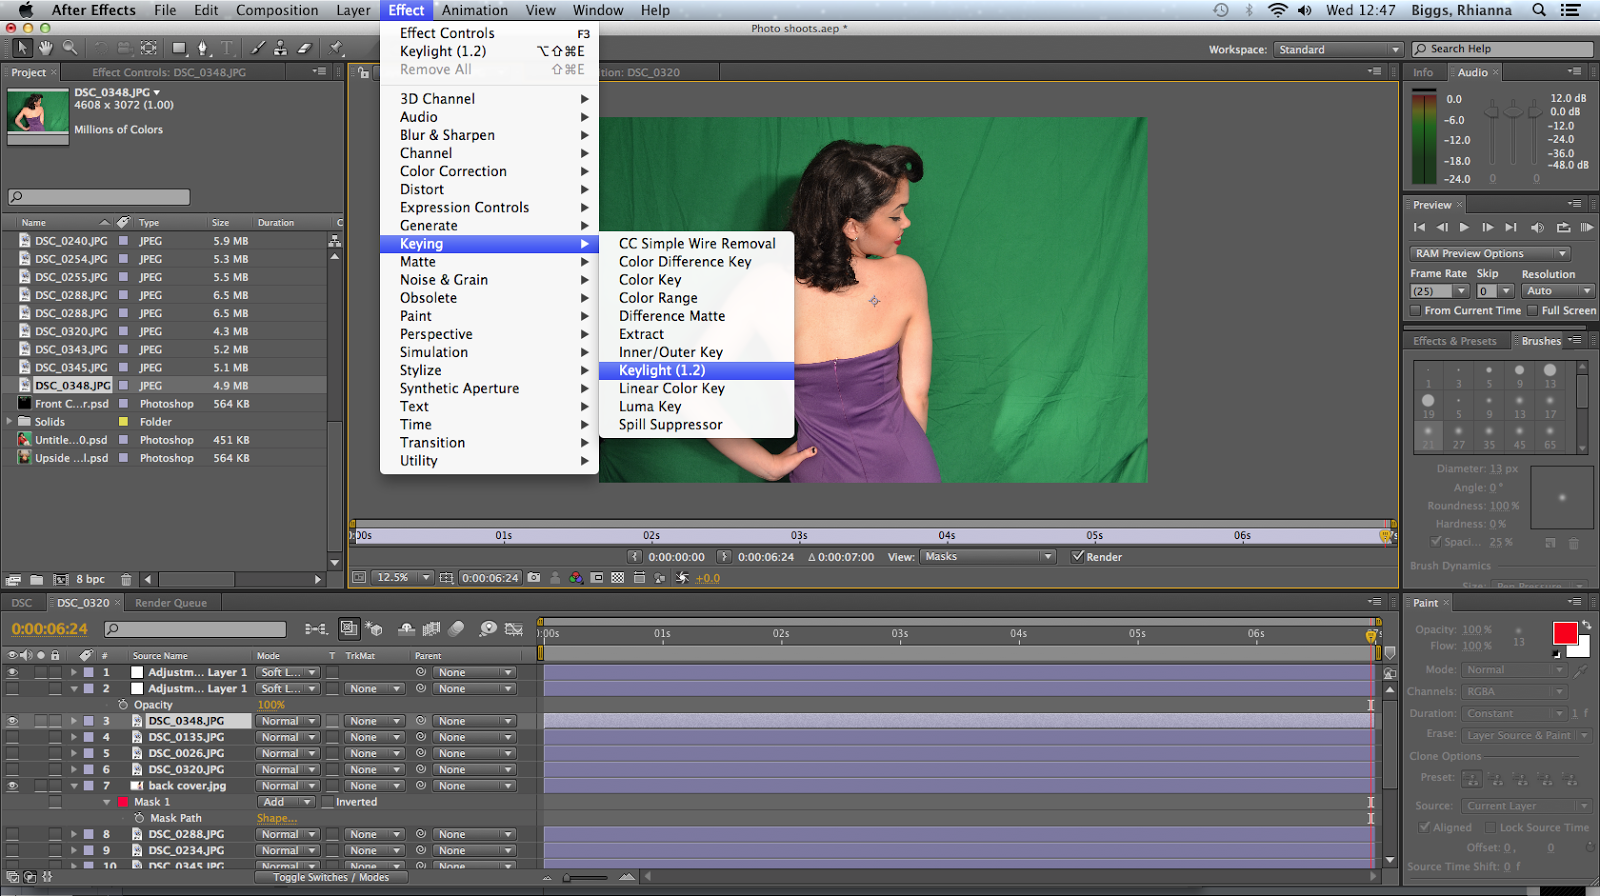
Here is the before shot of my picture before I removed the green screen.

This is the after shot of my picture after I removed the green screen. As you can see there are a few creases on the left hand side of the image and that is due to there being creases in the green screen when I took the picture. Thankfully, this issue was easily solved as I was able to cut around it using the pen tool.


After I had edited my images I had to convert it into a PNG sequence in order to keep the transparent background, then I added it to the render queue in order to use it in Photoshop.


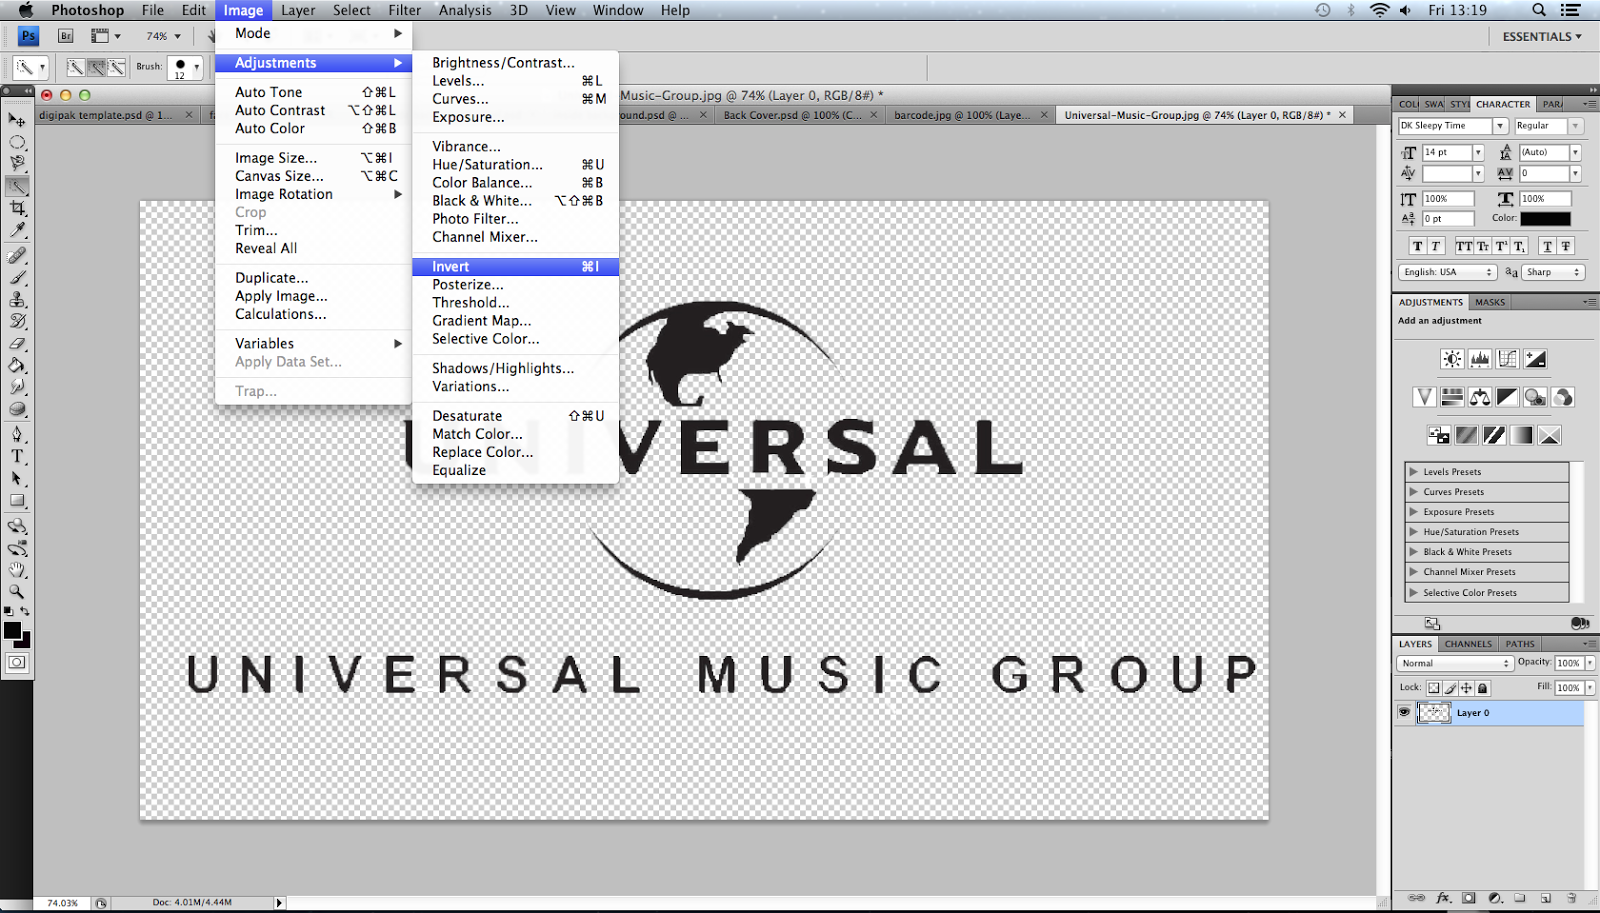
This is the logo for the record company that I have chosen to represent my artist. However, I had to edit it before I added it to my album cover and my poster as it was originally on a white background and I didn't feel it looked professional as my background was red and black so I had to use the Magic wand tool in Photoshop in order to remove the white background and make it transparent. After doing this I then had to use the adjustment tool and invert the writing to white instead of black so I could see the writing clearly on my poster and album cover.


This is a screen shot taken mid-way of my editing process of my digipak. I've chosen to fragment my artists body by having one panel just be a close up of her face and another panel just showing her legs to illustrate the brokenness of my artist, this is also a theme that will feature in my music video as after researching similar artists, especially ones in the indie genre, they tend to write songs about vulnerability and the feeling of emptiness or loneliness so I thought it would be fitting to include this in my DigiPak.

From past feedback on my previous album cover I was advised to have a more interesting background as it was previously just a red background,which was rather bland so I decided to add a background, then I edited it by adding colour to give it more depth. Moreover, due to this change I had to add this background to all the panels in order to keep it consistent.

Monday 15 December 2014

Magazine Advert and Album Cover Audience Feedback


The overall feedback I received was positive, as they all liked the choice of colours for the background and they all thought the artist stood out in front of the back ground which is good. However, a comment that kept being mentioned was that the record company's logo wasn't as clear and visible. From receiving this feedback I'm now going to make a few adjustments, bearing those comments in mind.


Friday 12 December 2014

Final Draft- Magazine Advert


After many drafts here is my final draft of my magazine advert. 


Magazine Advert draft 6


From feedback from my peers I'm leaning more to choosing this advert as my final draft but it still needs a bit more tweaking.


Thursday 11 December 2014

Magazine Advert Forth and Fifth Draft


Behind the Scenes


Below are a few shots me setting up the equipment for the photo shoot of my artist.


Here is a shot of myself setting up the green screen which was used for the backdrop of the photo shoot. I was advised by another student to tape the edges round to make the screen as tight as possible to avoid  any creases as they will show up and will make the editing process a lot harder.

Here is  picture of the work lights being set up, I chose to use these particular lights as they are very powerful and in a few of the shots I solely had those lights on and it gave the impression that my artist had a spotlight on her which looked really good. Due to these lights I was able to be get really creative in my choice of shots and lighting.


 Below are a few shots of me taking pictures of my artist and reviewing them. During this shoot I managed to take a whopping 340 images, therefore choosing the selected amount of images to use in my DigiPak and my magazine advert was difficult.


Saturday 6 December 2014

Potential Album Covers


I created these three album covers as mock ups for my final digipak but I came to a conundrum as I like all three and can't decide which one to choose. To tackle this issue I'm going to leave it up to my target audience to decide by asking for feedback and the picture with the higher amount of votes will be selected.

Friday 28 November 2014

Editing stages - After Effects and Photo Shop


This screenshot shows me using the pen tool to erase everything else in the scene.


Below is a before and after shot for the inside of my DigiPak. I used After Effects to key out the green screen and to add effects to the image such as the colouring.


To undergo this edit I chose to use the programme 'After Effects', as I'd never really used it before I struggled at first to get the effects on the images. I learnt how to 'key out' the green screen to make the background transparent. I then played around with the colouring of the image by giving a reddish tint to give the image more edge and depth. After doing this I then imported the picture onto photoshop, another editing programme, to remove any blemishes on my artists face, I also gave her a beauty mark as I thought it was rather fitting for the character of Liberty Haze.


Friday 21 November 2014

Photo Shoot


Below are a selection of some of my favourite images from the shoot. I have also made a short slideshow video on Final Cut to exhibit all the images taken on the shoot in their original format to demonstrate the variety of shots and costume used. I shot my artist in front of a green screen as I planned to change the background in post.


Wednesday 12 November 2014

Test Shoot


Below are some images I took when I did my test shoot for my music video.


This is a shot of Primrose Hill, this is the place that I have chosen to film the time lapse for my video and the set for my artist to be hanging out with her friends. I chose this place in particular because its's an infamous place for tourists and young people to hang out as the view is amazing and it is only two stops away from Camden Town on the bus. The one issue with this shot is that because I focussed mainly on the landscape the skyline looks washed out.


This was an accidental shot that I took when I was playing with the focus button on my camera but I thought it looked really good because it captured the colours from the sun and her hair beautifully.


This is a screenshot of the footage I retrieved from my first attempt at filming the time lapse. As you can see the picture is quite drab compared to the other pictures which were all taken on the same day, this was because the footage was highly exposed thus resulting in this looking like there was an overcast.

In my video I want to be experimental in my choice of shots, so I tested out an extreme close up shot on my friends eye, as in my video I want to show my artist putting on mascara so I wanted to see if this would be doable. However as you can see the focus was on her hair mainly so the eye isn't as clear as it could be.
Here is my second attempt at an extreme close up, I believe this one is much better as there is more focus on her eyeball and eyelashes compared to the first one.